
Finished this quilt a while back. It was very challenging for my neck, so it took a while. It is mostly sewn by hand. Since I've had Jack Russell Terriers (JRTs), I decided to make a JRT biscuit quilt. The biscuit or puff quilts looked like so much fun, and I had some foam from a previous dog bed that had gotten torn up.
I took great photos this time to walk you through the process:
I had an old plastic cutting board sheet. (2 for a $1 at $1 store)
Cut a 5" square marking the center with a dot
Put the transparent square over my dog fabric, centering around the JRT
Marked with my favorite
Secret Fabulous Sewing tool.
Cut with a rotary cutter (with mat underneath, of course)
There were different JRT faces, so I marked and cut each one out.
These were the three faces, although, I only had a couple of the one on the left for some reason.
Cut as many squares as you like. The finished quilt will
not be the same size.
It will be
much smaller.
I didn't have enough JRT squares to make a quilt, but I had this cute fabric, so I cut some squares of it.
Then I cut 3.75" squares using a ruler and rotary cutter. I did not do this for the JRT squares because I wanted the faces centered. The blue, it doesn't matter.
The JRT and puppy fabric will be the tops of the quilt. The blue squares are backing. The whole quilt will also get a backing.
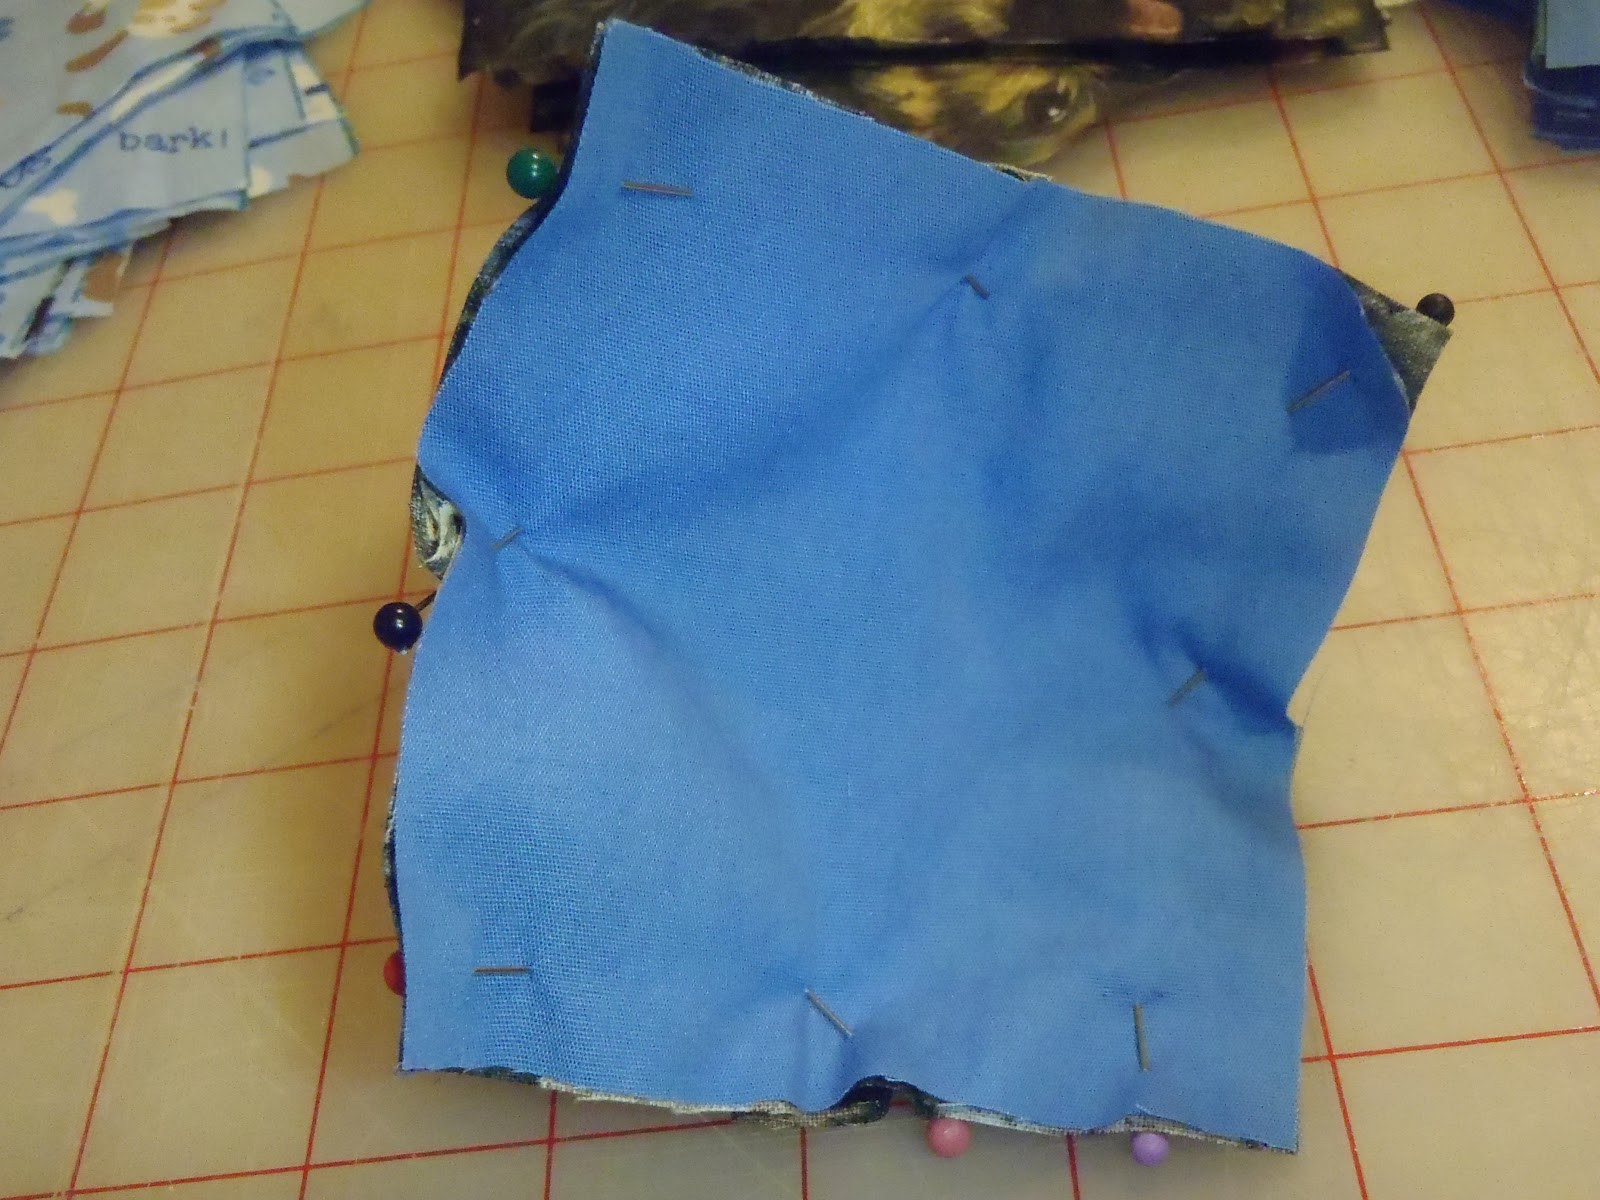
With WRONG sides together, pin the top to backing.
Pin one corner.
Pin second corner adjacent to 1st corner.
You'll see it puffing in the middle now.
This is the tricky part. You want to fold the top so that it fits flat with the backing.
You can mark the center of each JRT/puppy top piece to make it easier.
Pinch the center of the top fabric.
Carefully push down on fold to create another fold like this.
It takes practice, but don't worry, you'll do this umpteen times.
Then pin in place.
The top should now fit flush with backing.
I tried gathering the fabric, but it really turns out better to do the folds.
This is what it should look like when done properly.
Repeat folds for all sides.
Carefully sew a 1/2" seam almost all the way around.
Sew right before a fold, and stop right after the last fold, leaving open one corner.
This is where you will add your stuffing.
I had some old memory foam from a mattress topper which I had then turned into dog beds. One of the dog beds was starting to fall apart, so I took the foam from that one to use in this puff quilt since it needs pieces. Great way to reuse materials!
For foam, I found I needed to cut it into small pieces.
You could use anything to stuff the quilt with really.
Polyfil tends to flatten over time. With foam, the quilt gets heavy, so I use it as a bed rather than a cover.
Squish the foam into a tight ball
Start stuffing until it feels full.
Stuff corners first, then the center.
It will look something like this.
I tried sewing the last corner up, but realized I would have to sew the seam when putting the pieces together.
So this step is not necessary, unless you find your stuffing is coming out. Just baste it if this is the case.
Line up all your biscuits in the pattern you want.
I alternated the faces and the blue puppy fabric.
With RIGHT sides together, pin one biscuit to another.
Yep, you're gonna hand sew. Thread your needle, and knot the thread on one end.
The foam made it to difficult to get the seams under the sewing machine properly.
I used hand quilting thread because it's strong. You can use whatever you want.
I find gray is a good thread color to use while quilting different colors of fabric. It doesn't really stand out on any other color.
You can pin a row of them together at a time so that you don't have to stop, pin, sew, stop, pin, sew, etc.
This is called a back stitch. It is the strongest hand sewing stitch - similar to a machine stitch.
From the back side of the seam, bring your needle forward close to the edge.
You can use a 1/4" seam here.
(This photo shows the needle a little too far out from the seam.)
I tried sewing on or inside of the 1/2" seam, but it's very difficult to get the needle in in the center of the seam. So, the 1/2" seam threads will show on the front, but that's ok.
Now put your needle in the fabric to the left of the first stitch. Make the stitch as wide or narrow as you want.
From the back again, come out about a stitch length to the left of the second stitch.
Here's where you back stitch.
Put the needle in the fabric near the second stitch.
Repeat bringing the needle up one stitch ahead, then a back stitch.
Continue across the seam.
Do the 1/4" seam, unlike in this photo.
If you make a shorter seam, the biscuits will be further apart.
The further in the seam, the closer the biscuits are.
BUT, the smaller the quilt will be.
Here it is with a close to 1/2" seam.
Again, it's hard to get the needle in there when it's close.
Continue sewing all the rows of biscuits together.
Make sure you keep your pattern.
Pin and sew together the rows.
Not pictured, but put a backing and create a ruffle if you want. The ruffle is about 3x the perimeter of the quilt in fabric.
Baste the ruffle on one side, and gather the bobbin strings. Evenly space and pin the ruffle to the quilt.
Cut a backing fabric piece and hand sew.
I know that was quick on that step, but I forgot to take pictures.
There you go, your biscuit quilt. Spec sits on it in the kitchen while we eat :).
I like the way it came out. It will not work for covers though. You would have to use a very light weight stuffing. And since we live in San Antonio, TX, it would be too hot to cover up with.
Overall , fun to make if you want to do some hand sewing work.
I give it 4 buttons up, mostly because it's not neck friendly work.
 Finished this quilt a while back. It was very challenging for my neck, so it took a while. It is mostly sewn by hand. Since I've had Jack Russell Terriers (JRTs), I decided to make a JRT biscuit quilt. The biscuit or puff quilts looked like so much fun, and I had some foam from a previous dog bed that had gotten torn up.


No comments:
Post a Comment